Activity Run Page with Example
Posted under features on September 13 , 2019 by Nidhisha Shetty
SheetKraft activity run page is used to provide inputs, if any, for an activity run.
Following is an example of Activity Run page:
Each input has any one of the following types:
- Text
- Number
- Date
- Boolean
- File path
- List
- Table
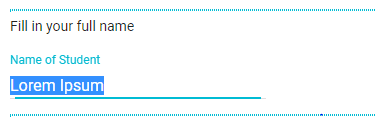
- Text: A text value is expected as the input. A text box will be shown in the user interface as shown in Fig 1.1.
Fig 1.1: Text box to enter text.
- Number: A numeric value is expected as the input. A numeric field will be shown in the user interface as shown in Fig 1.2.
Fig 1.2: Text box to enter number.
- Date: A date is expected as input. A popup calendar will be shown in the user interface for date selection after you click on the field as shown in the following figures:
Fig 1.3: Date of Birth field.
Fig 1.4: Calendar to enter the date.
- Boolean: A Boolean value (TRUE / FALSE) is expected as an input. A checkbox is provided for the user.
The checkbox can take one of three states – checked (True), unchecked (False), or unspecified as shown in the following figures:
Fig 1.5: Unspecified.
Fig 1.6: Checked (TRUE).
Fig 1.7: Unchecked (FALSE).
- File path: A file is expected as an input to the activity. The file upload button is displayed on the user interface to upload the file as shown in Fig 1.8. Once you click on the Upload button, file explorer will appear on the screen, you can select the file that you want to upload. Click on View Sample Input File (highlighted in Fig 1.8) to download and check sample input file.
Fig 1.8: Upload button to upload files.
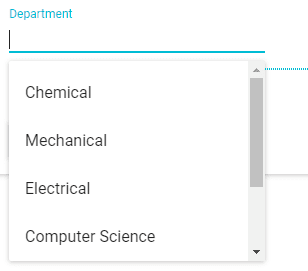
- List: A drop-down list is shown after you click on the field as shown in the following figure; user can choose one of the options specified.
Fig 1.9: Drop-down list.
- Table: It is used to provide tabular data as an input. Table can have dynamic number of rows (Fig 2.0) or static rows (Fig 2.1)
- Each column can have a different input type(text, number, date, and so on).
- The + symbol in Fig 2.0 indicates that the user can add more rows.
- The bin symbol in Fig 2.0 figure indicates the user can delete a row.
- In static rows type, default number of rows are provided, where the user cannot add or remove rows as shown in Fig 2.1.
Fig 2.0: Table input with add and delete rows option.
Fig 2.1: Table input with default number of rows.
Following are some additional properties which define input fields behavior:
- Required: Providing input value is mandatory. An error is thrown if left blank and proceeded with start activity.
Fig 2.2: Required field.
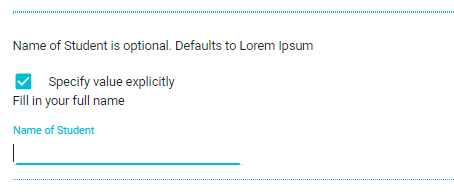
- Optional: Providing input value is not mandatory. A default value is considered as an input value for that field. If a user wants to explicitly enter a value, user is required to check the Specify value explicitly checkbox, which will allow the user to explicitly enter a value.
Fig 2.3: Optional field.
- Suggested: The input field will have a default suggested value which the user can edit and modify.
Fig 2.4: Suggested field.
- Display: A default value is already taken as an input and displayed. User cannot modify or delete it.
Fig 2.5: Display field.
Let us consider an example of an activity runner having student details such as first name, last name, roll no, date of birth, backlog details, uploading marksheet, department, course.
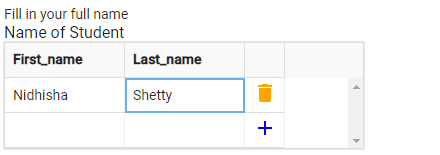
- Name: Enter name in table format as shown in the following figure:
Fig 2.6: Name in table input.
The first name and last name are entered in the respective columns.
- Roll no: Enter a numeric value in this field as shown in the following figure:
Fig 2.7: Roll number field with number data type.
- Date of Birth: A date is entered using the calendar pop up.
Fig 2.8: Date of birth field.
- Backlogs: Boolean value (TRUE/FALSE/NULL) is to be entered in this field using the checkbox.
Fig 2.9: Checkbox checked (TRUE).
Fig 3.0: Checkbox unchecked (FALSE).
Fig 3.1: Checkbox blank (NULL).
- Marksheet: Upload the marksheet in excel format. To view a demo file, click on View Sample Input File link as shown in the following figure:
Fig 3.2: Upload marksheet field.
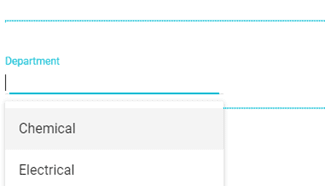
- Department: Select a department from the drop down list as shown in the following figure:
Fig 3.3: Department field.
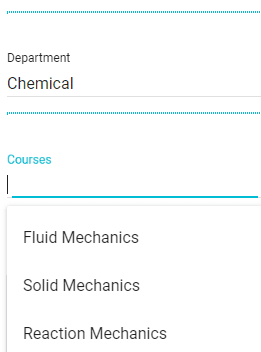
- Courses: Select a course using the dropdown list, however the options specified in the drop down menu of this field is dependent on the option selected from the dropdown menu in the Department field:
Fig 3.4: Courses field.
TAGGED:ActivityWebsiteInputsOutput
Let's talk
Address
7th floor, Unit No. 715, C Wing,
Kailas Business Park, S. Veer Savarkar Marg,
Park Site, Vikhroli (W), Mumbai-400079.

